How to Add a Custom Range Slider to a Form
Add a customizable range slider to your forms...
Overview
This guide gives you a quick overview on how you can add a custom range slider into your Webflow forms.
To add this into your project, follow these simple steps and add the custom code into your project or page settings.
Instructions ✍️
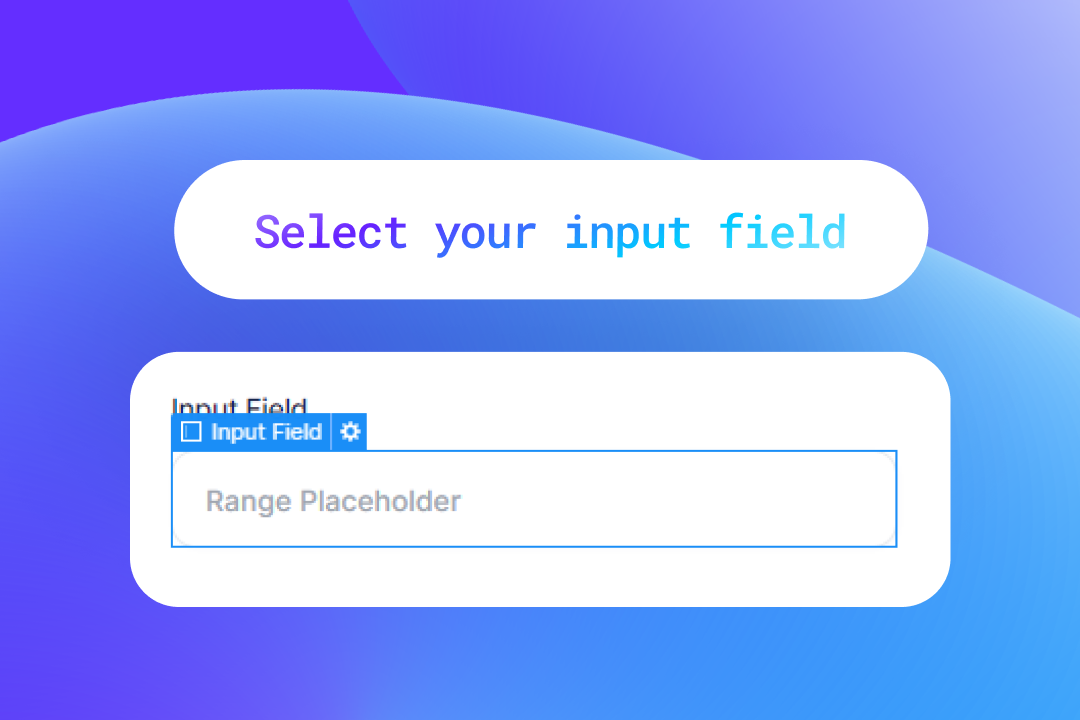
1. Add a form block and select the input field
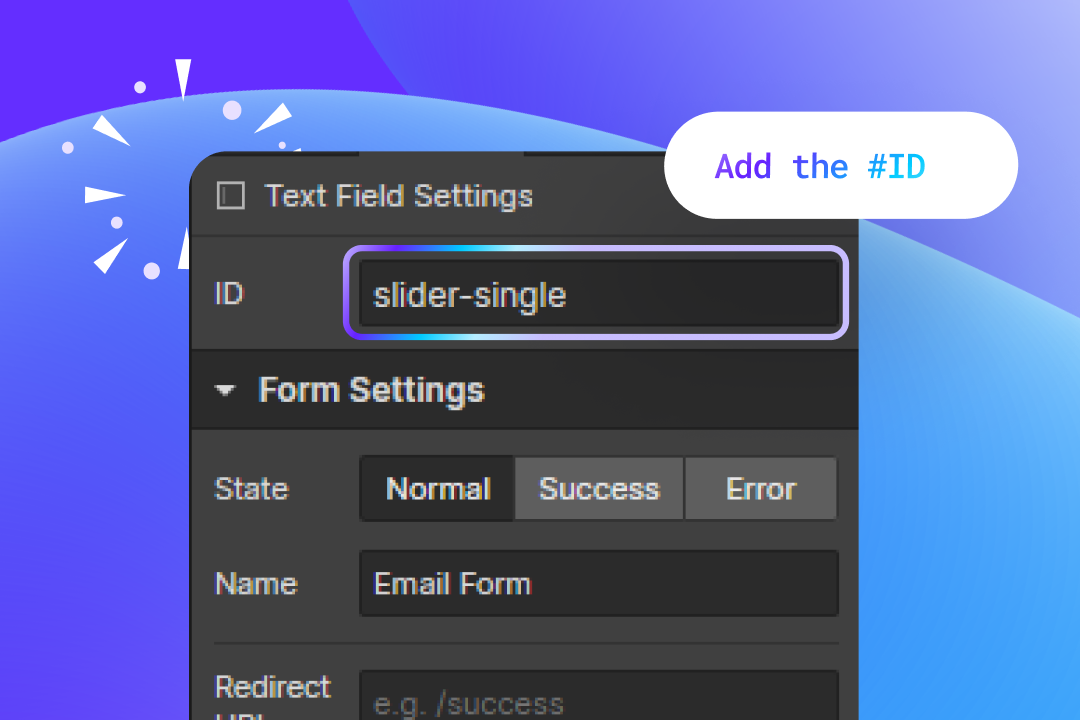
Add your form block and input field to the page. We will be adding unique IDs to the input field in order to connect with our range slider. You can find the ID at the top of your text field settings panel.
To use the Single Range Slider, add the ID
#slider-single
To use the Full Range Slider, add the ID
#slider-range

2. Add the Range Slider #ID
To turn your input field into the range slider, simply add the ID to the text field as shown below.
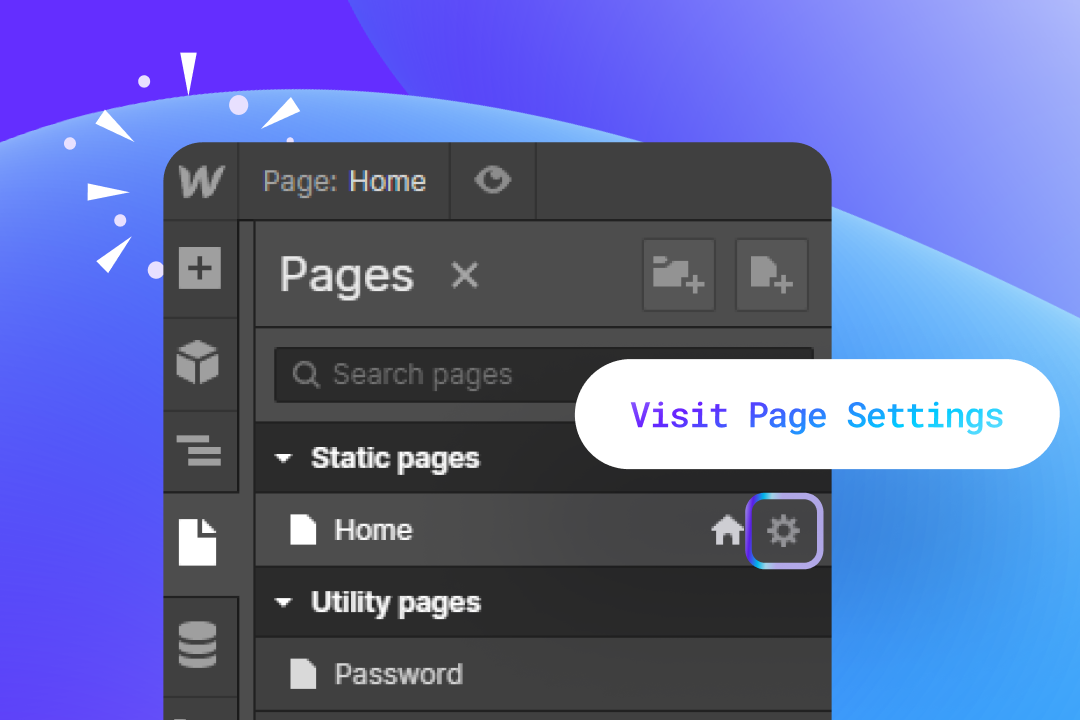
3. Add the custom code to your custom code area

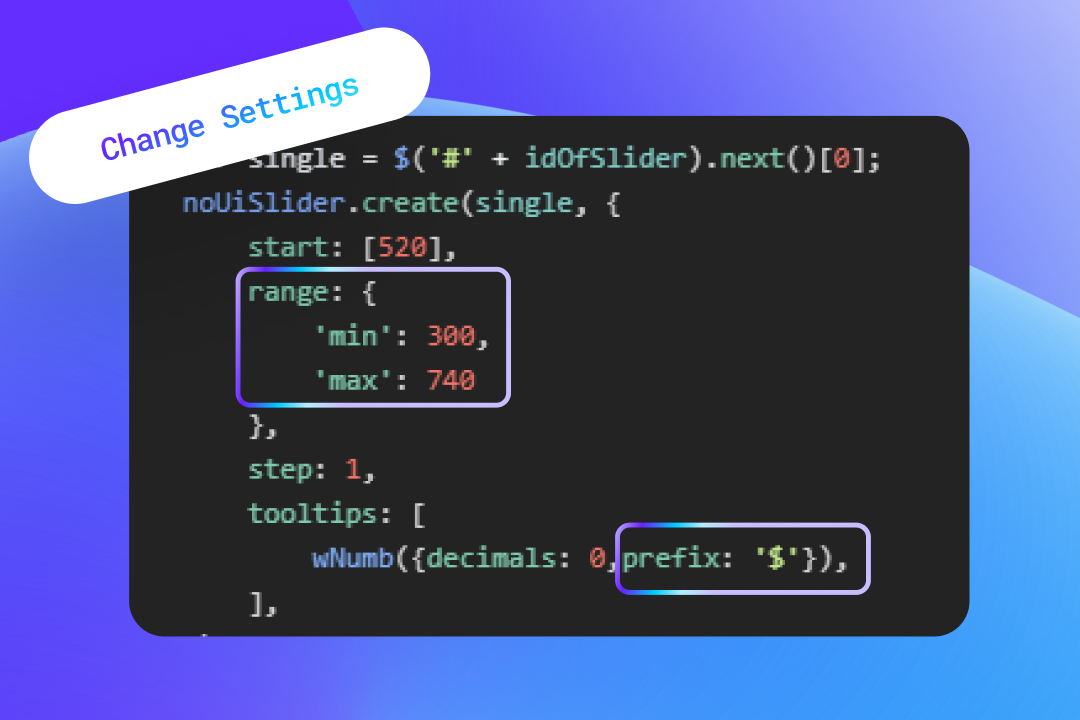
4. Edit your range settings.
We've included some basic settings, such as the range, where it should start, the steps plus more. You can also add a prefix like a $ or other currency codes. Take your time to review the script and experiment with changes as required!
Publish your site and test
To check everything is in order, publish your page and view the live link.
Did you find this useful? 💕
Your support means the world to us! In just 10 seconds, you can make a big difference:
- Join our community Discord Channel.
- Download our Free Webflow Booster App.
- Share what you built with us on Twitter! We re-post to thousands!
Thank you for being awesome! 🌟


Discover unlimited inspiration to help you build better, faster.


Join our community and
claim free products
No Spam. Only sweet content and updates of our products.
Join 100k+ other creators in our community


