Overview 📚
Learn how to use browser cookies to hide elements from your visitors when they select to close or hide it.
The outcome of this guide will help you create an element like a pop-up, and only show it to your vistor once. This is super useful for things like modals, pop-ups, advertisments, banners etc, since if the customer shows intention to hide it, we can keep it that way for a specific time-frame.
To add this into your project, follow the simple steps and add the custom code into your project or page settings.
Instructions ✍
1. Add the script into your custom code settings.
Please copy the first script into the <head> section of your custom-code settings. You can also install this and add a demo cookie to your project instantlly through our Webflow Boosters App.
<script src="https://cdn.jsdelivr.net/npm/@flowbase-co/boosters-cookie@1.0/dist/cookie.min.js"></script>
2. Review the Cookie Attributes
Review the table below to see the sorts of attributes that we will be adding to our cookie component. These are super simple attributes, that only need to be added to two different elements - the main cookie wrapper, and the button to close it.
3. Add the attributes to your main wrapper
In your navigation, select the main parent wrapper that will contain all your components content. Once the element is selected, add the following attributes to it (fb-cookie=true) to set it as on, and (fb-cookie-duration=30) to set the days the cookie will be set for.
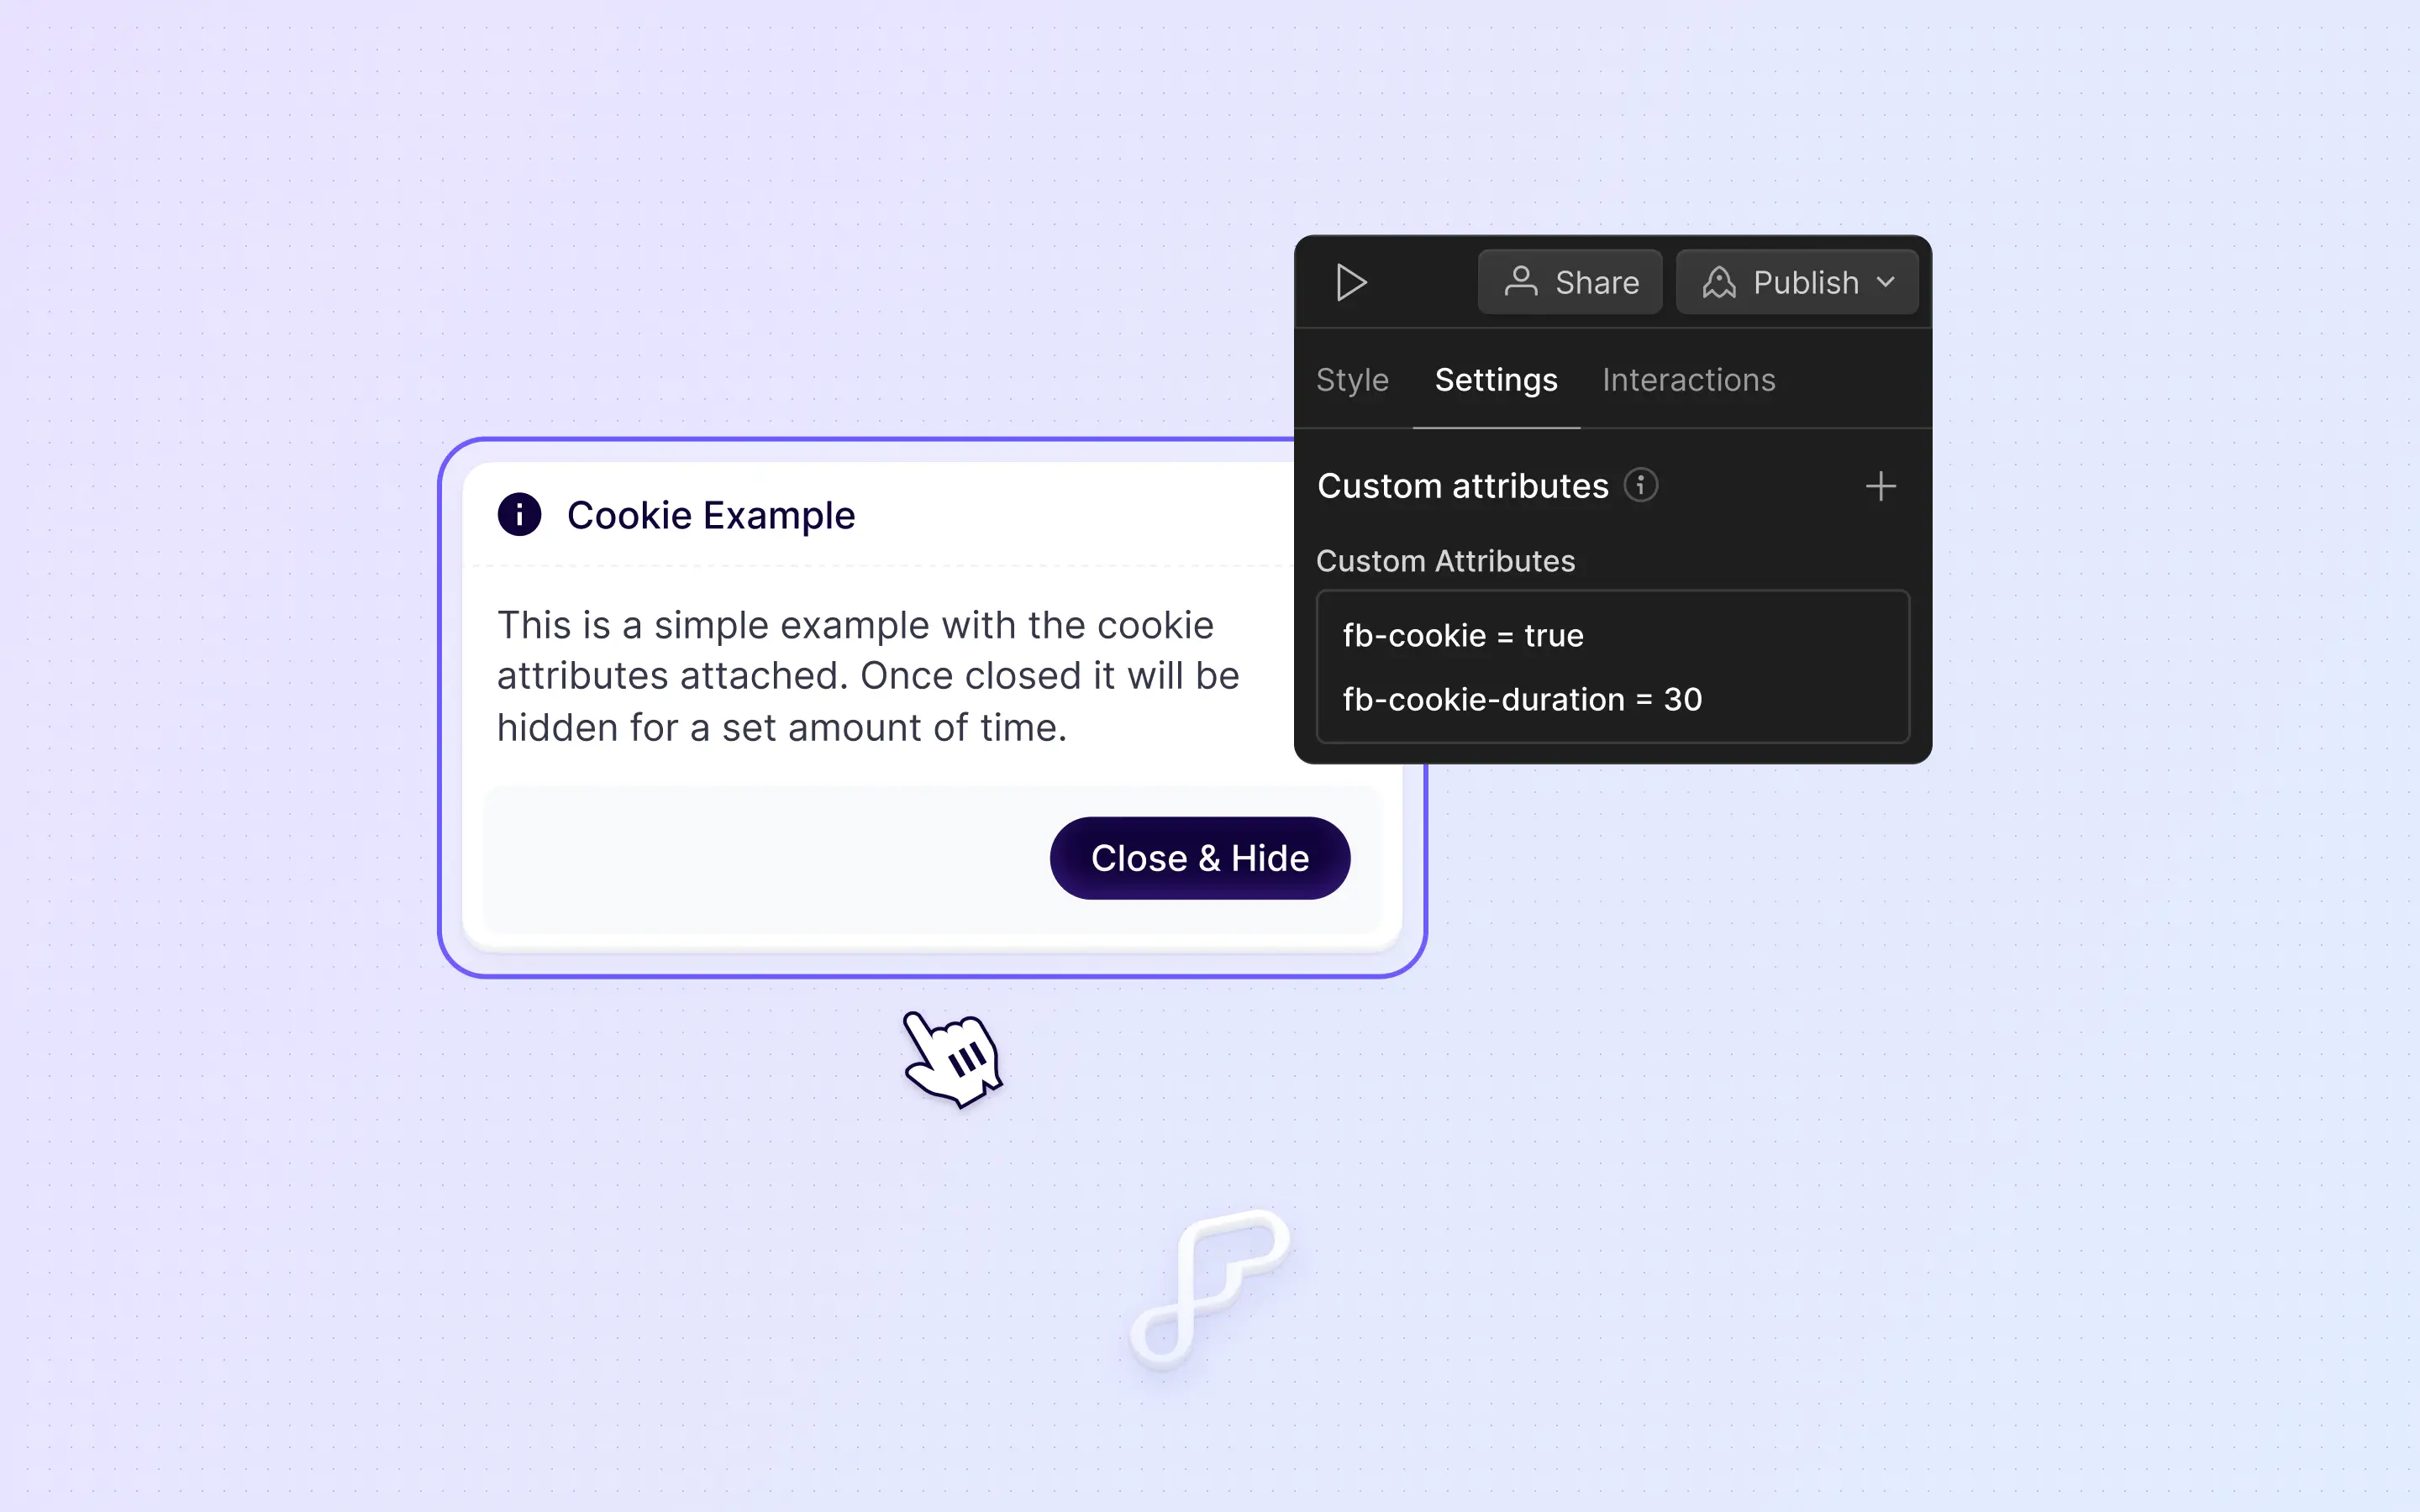
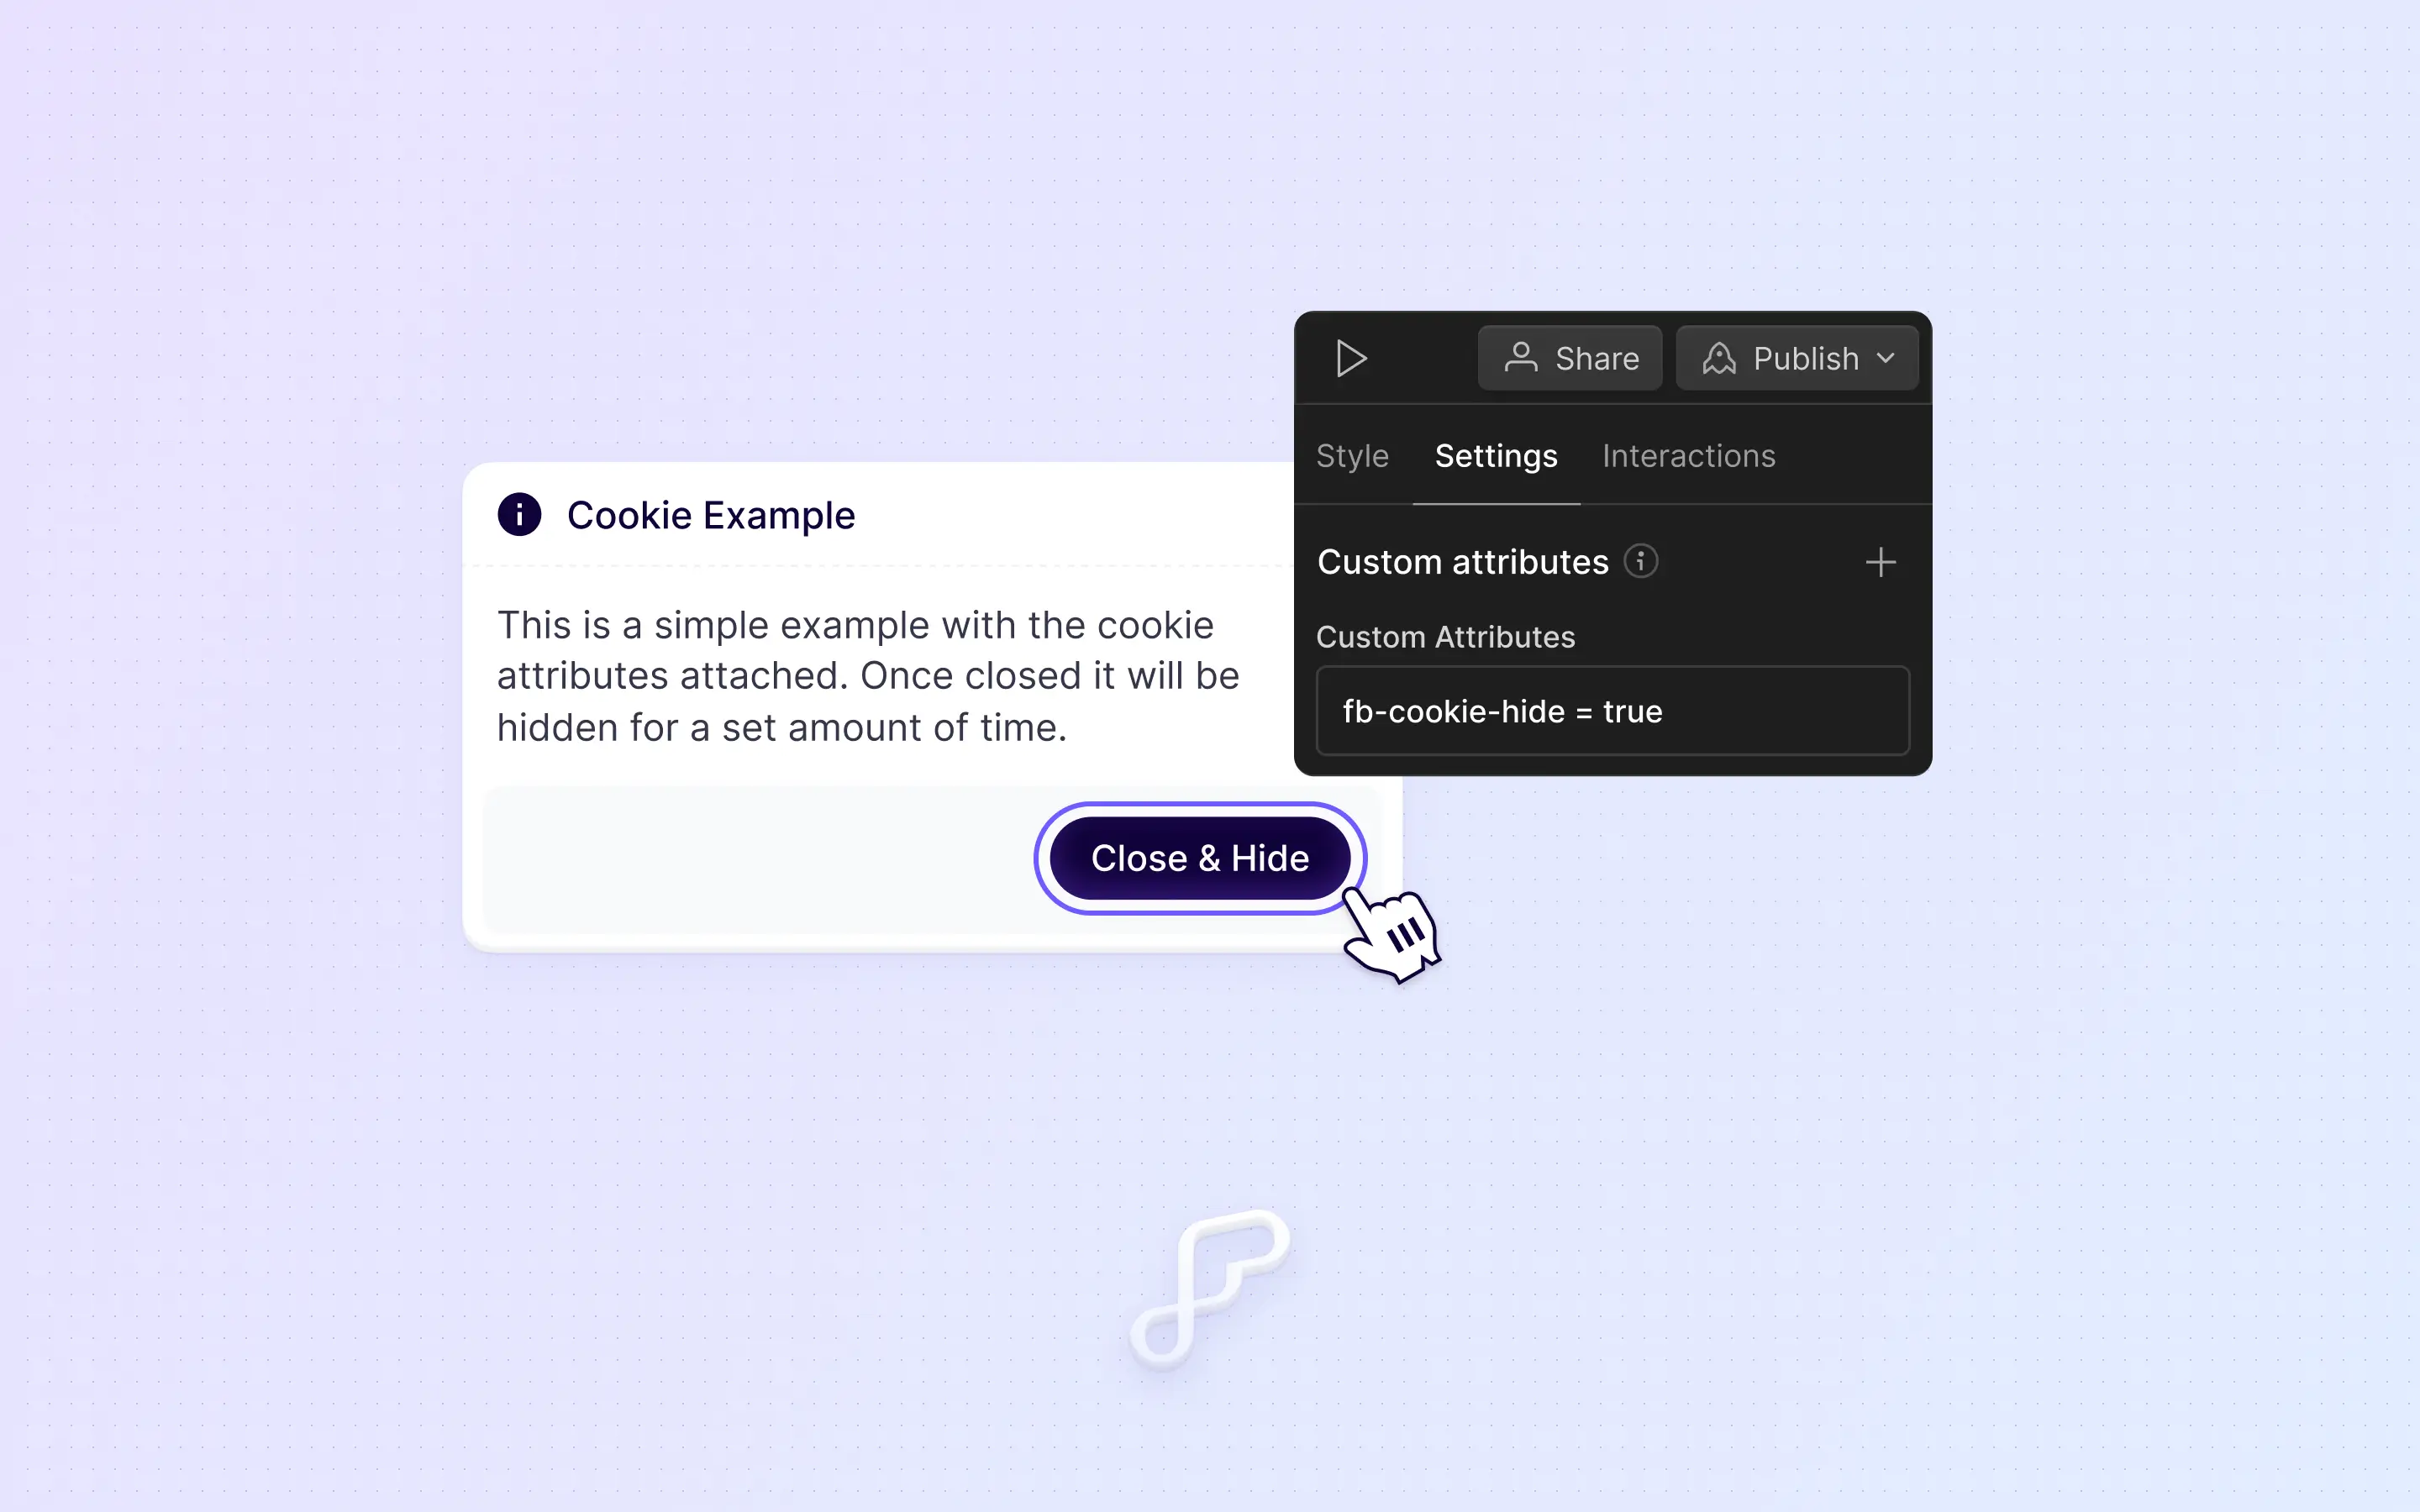
4. Add attributes to your close / accept button.
Now select the button that the visitor will use to close or hide the component. This could be a button, or an 'x' icon, it's up to you! Once selected, add the attribute (fb-cookie-hide = true) to it, which will let the script know your intentions.
5. Bonus Tip (Stop Flashing)
Once you have finished designing your cookie component, we recommend you hide it to avoid any flashing that might occur. Since the script manages all your display states, hiding the cookie after finishing it's design is always recommended.
6. Publish & test your cookie
Once you publish your site you should be able to test this yourself. If you want to check it a few times, just load up a new window in incognito to test it without those saved cookies.